Cricket Helmet Sizing Steps for Optimal Fit and Safety
Most cricket players know that a helmet can protect you from serious injury on the field. Incredibly, just a one centimeter difference in head circumference can mean the difference between a perfect fit and a risky gap in protection. You might think grabbing any helmet in your size is good enough, but small missteps in sizing leave players exposed to more danger than they realize. Nailing the perfect fit is the easiest step you will ever take to make sure your helmet actually keeps you safe when it matters most.
Table of Contents
- Step 1: Measure Your Head Circumference
- Step 2: Compare Measurements with Size Chart
- Step 3: Try On The Helmet For Fit
- Step 4: Adjust Padding And Straps As Needed
- Step 5: Perform A Safety Check Before Use
Quick Summary
| Key Point | Explanation |
|---|---|
| 1. Measure Head Circumference Accurately | Use a flexible measuring tape at eyebrow level for precise head size. Repeat measurements to ensure consistency before recording. |
| 2. Compare with Manufacturer Size Charts | Size standards vary by brand; always match your measurement with the specific size chart for an accurate fit. |
| 3. Try on the Helmet for Proper Fit | Secure the chin strap and test stability during movements. The helmet should feel snug yet comfortable with even pressure. |
| 4. Adjust Padding and Straps as Needed | Customize internal padding and chin strap tension for the best fit. Ensure no gaps or uncomfortable pressure points during wear. |
| 5. Conduct a Final Safety Check | Inspect the helmet for cracks, ensure padding is intact, and verify chin strap functionality before use for maximum protection. |
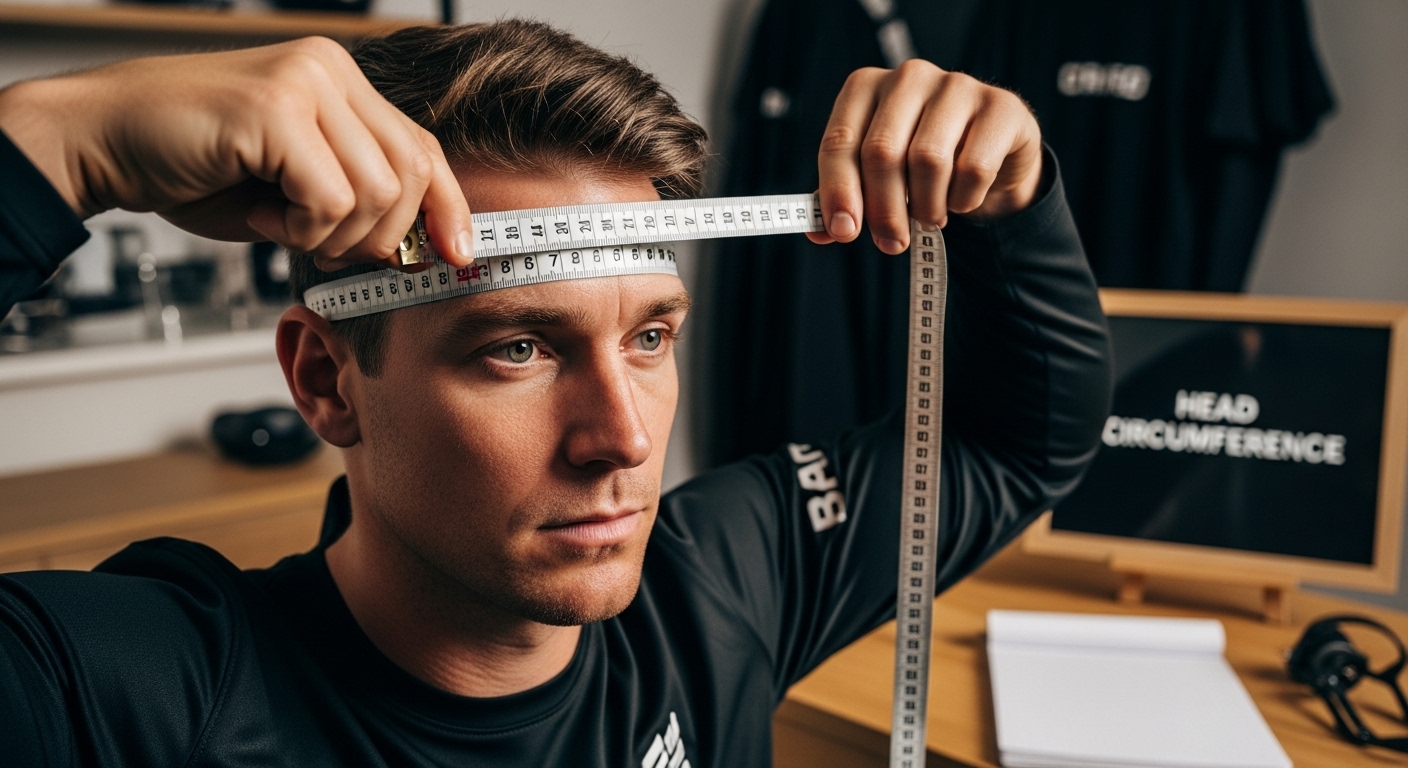
Step 1: Measure Your Head Circumference
Selecting the right cricket helmet begins with precise head measurements. Understanding your exact head circumference is crucial for ensuring maximum safety and comfort during play. The measurement process might seem simple, but it requires attention to detail to guarantee an optimal fit.
To start, you will need a flexible measuring tape or a piece of string and a standard ruler. If using a string, wrap it around your head and then measure the length against a ruler. Position the measuring tape or string approximately one inch above your eyebrows, ensuring it passes around the fullest part of your head. This location typically provides the most accurate measurement for cricket helmet sizing.
Measure your head at least two to three times to confirm consistency. Record the circumference in both centimeters and inches, as different helmet manufacturers might use varying sizing standards. For instance, a head circumference of 56 centimeters translates to roughly 22 inches. Most cricket helmet manufacturers provide detailed size charts that correlate directly with these measurements.
According to research published in Applied Ergonomics, accurate head measurements are fundamental to reducing potential injury risks. The study emphasizes that even a slight variation in helmet fit can significantly impact protection during high-impact scenarios.
When measuring, maintain a neutral head position and keep the tape or string level and snug but not overly tight. A common mistake is pulling the measuring tool too tightly, which can result in selecting a smaller helmet size than necessary. The goal is to capture your natural head shape without compression.
Once you have your precise measurements, compare them against the specific sizing chart of the cricket helmet brand you are considering. Some brands might have slight variations in their sizing recommendations, so always double-check their unique guidelines. Pro tip: If your measurement falls between two sizes, it is generally recommended to choose the larger size for enhanced comfort and safety.
Verify your measurement accuracy by checking these key indicators:
- The measuring tape or string sits level around your head
- You can fit one finger comfortably between the measurement tool and your head
- Measurements are consistent across multiple attempts
By dedicating time to this initial sizing step, you are laying the groundwork for selecting a cricket helmet that provides optimal protection and ensures you can focus entirely on your performance on the pitch.
Step 2: Compare Measurements with Size Chart
After carefully measuring your head circumference, the next critical step in cricket helmet sizing is precisely matching your measurements to the manufacturer’s size chart. Not all cricket helmet brands use identical sizing standards, which makes this comparison process essential for finding your perfect fit.
Begin by gathering size charts from different cricket helmet manufacturers. These charts typically display head circumference measurements in both centimeters and inches, allowing you to cross-reference your recorded dimensions. Pay close attention to the specific brand you are interested in, as sizing can vary significantly between manufacturers.
According to the Centers for Disease Control and Prevention, properly fitting protective gear is crucial for effective injury prevention. When comparing your measurements, look for a size that provides minimal movement while ensuring complete head coverage. The ideal helmet should feel snug but not restrictive, allowing comfortable rotation without sliding or shifting during play.
If your head measurement falls between two sizes, professional cricket equipment experts recommend selecting the larger size. A slightly looser helmet can be adjusted with padding, whereas a too-tight helmet might cause discomfort and potentially compromise protection. Padding can be added, but excessive tightness cannot be remedied easily.
Below is a checklist summarizing the key verification steps to ensure your cricket helmet is properly fitted and adjusted before use.
| Verification Step | What to Check For | Result/Action Needed |
|---|---|---|
| Tape/String Placement | Sits level around head, one inch above eyebrows | Accurate, comfortable measurement |
| Measurement Consistency | Multiple measurements yield same result | Record value in cm and inches |
| Size Chart Comparison | Measurement matches or falls within brand’s recommended range | Proceed to helmet try-on |
| Chin Strap Fit | Allows mouth movement, prevents helmet shift | Adjust for both comfort and security |
| Contact Points & Padding | Even contact, no gaps or pressure points | Adjust padding for uniform fit |
| Helmet Alignment | 1 finger-width above eyebrows, rear covers occipital region | Adjust position for proper coverage |
| Final Stability Test | Helmet stable during head movement, no sliding or rotation | Proceed to safety check or adjust |
Most cricket helmet size charts categorize sizes into standard ranges such as small, medium, large, and extra-large. Some advanced brands offer more nuanced sizing options, including intermediate sizes like medium-large or extra-small.
Your precise measurement will help determine which category best suits your head shape and size.
Key verification points when comparing measurements include:
- Your head circumference matches exactly or falls within the recommended range for a specific size
- The size chart indicates the helmet will provide comprehensive head coverage
- Manufacturer guidelines suggest the size is appropriate for your age and playing level
Remember that head shape matters as much as circumference. Some helmets are designed for longer, narrower heads, while others accommodate rounder head shapes. If possible, try on helmets or consult with experienced cricket equipment specialists who can provide personalized sizing recommendations based on your specific measurements and head geometry.
This meticulous comparison process ensures you select a cricket helmet that provides maximum protection, comfort, and confidence during your cricket performance. By taking the time to match your measurements precisely, you are investing in your safety and performance on the pitch.
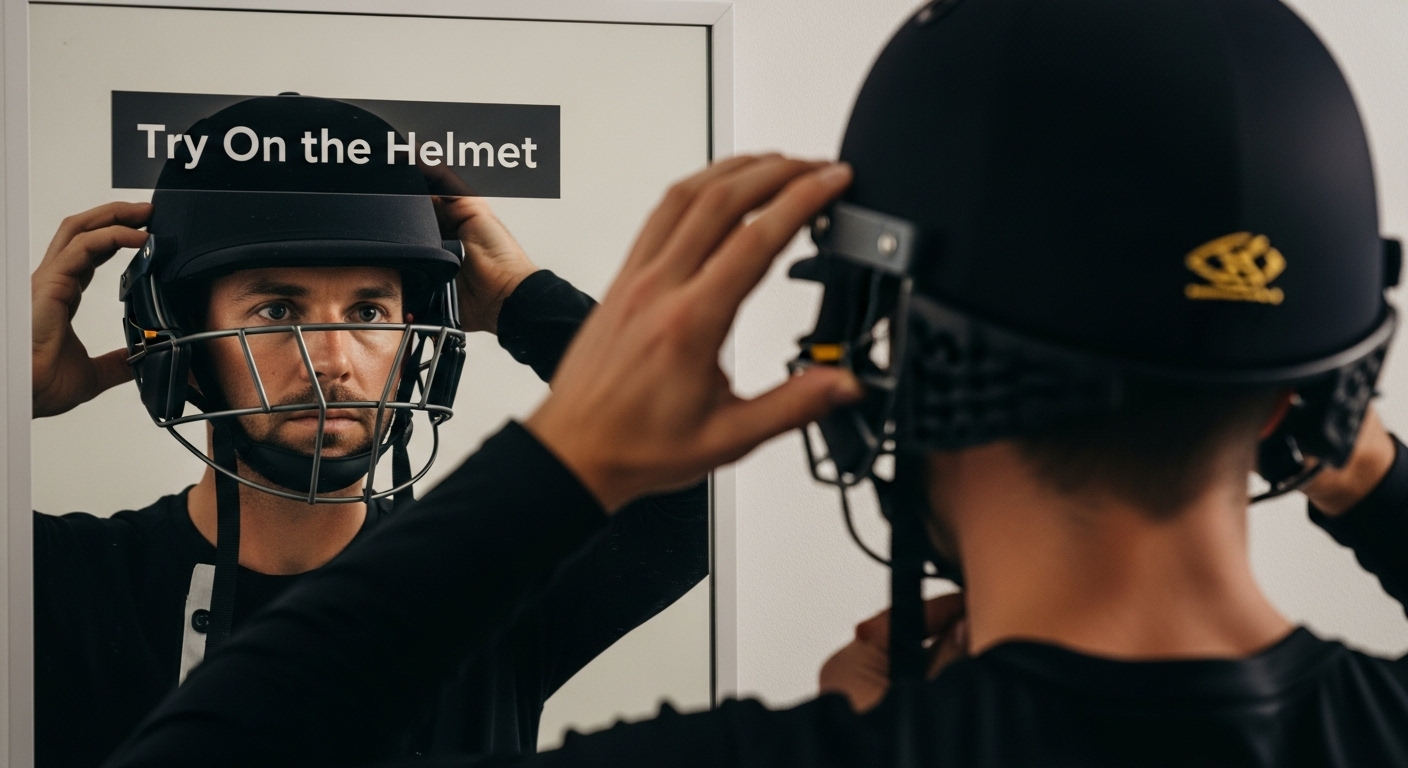
Step 3: Try On the Helmet for Fit
Trying on a cricket helmet is more than a simple fitting procedure it is a critical step in ensuring your safety and comfort during play. The physical try-on process reveals nuances that measurements and size charts cannot fully communicate. This step requires patience, attention to detail, and a systematic approach to evaluating helmet fit.
Begin by fastening the helmet’s chin strap securely. The strap should sit comfortably against your chin, allowing you to open your mouth without restriction while preventing the helmet from shifting during movement. A properly adjusted chin strap is your first line of defense against potential impact displacement.
According to research in the British Journal of Sports Medicine, helmet fit directly impacts a player’s visual field and overall protection. When trying on the helmet, perform a series of dynamic movements to test its stability. Tilt your head forward, backward, and rotate it side to side. The helmet should remain firmly in place without excessive movement or sliding.
Key fit verification points include checking for consistent contact points around your head. The helmet should touch your head evenly, with no significant pressure points or gaps. Press gently on different areas of the helmet to ensure it moves with your head rather than independently. Uneven pressure can lead to discomfort and potentially reduce protective capabilities.
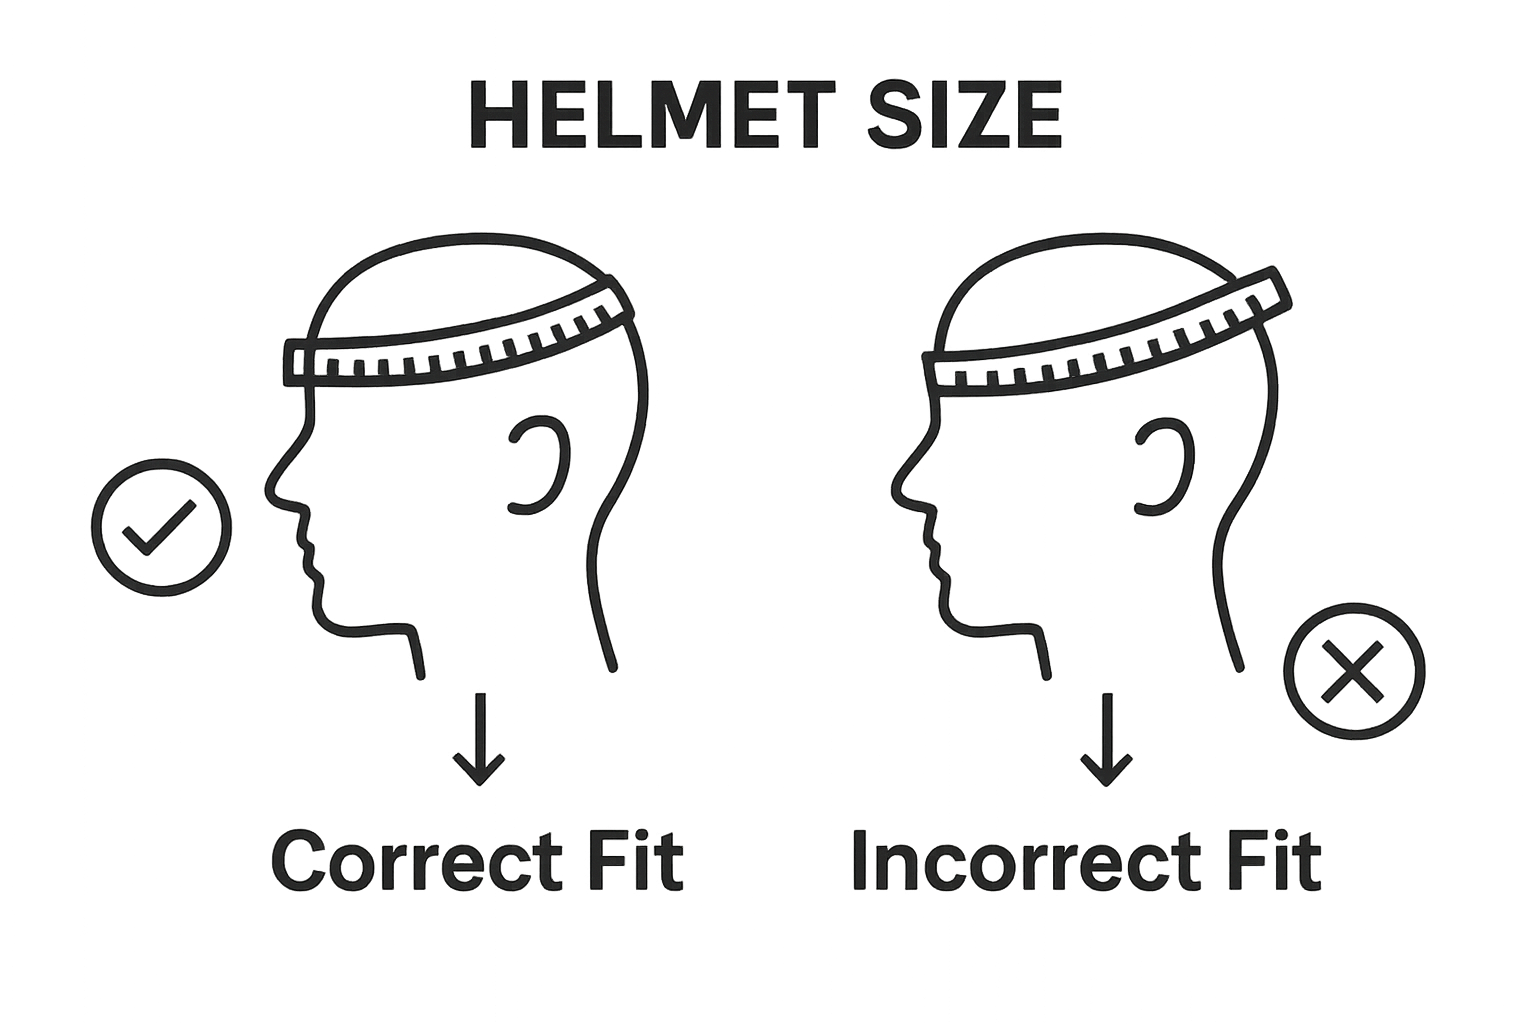
Pay special attention to the helmet’s alignment with your eyebrows and the back of your head. The bottom edge should sit approximately one finger-width above your eyebrows, providing optimal protection without obstructing your vision. At the rear, the helmet should cover the occipital region completely, protecting the base of your skull.
Verify the helmet’s fit through these critical assessment criteria:
- Chin strap allows comfortable mouth movement while preventing helmet shift
- Helmet remains stable during head movements
- No significant pressure points or uncomfortable areas
- Consistent contact around the entire head circumference
- Proper alignment with eyebrows and back of head
If possible, wear the helmet with your typical cricket cap or inner wear to ensure compatibility. Some players find that their preferred inner headwear slightly impacts helmet fit, so it is crucial to simulate actual playing conditions during your try-on process.
Remember that comfort and stability are equally important. A helmet that meets safety standards but feels uncomfortable will likely distract you during play. Trust your instincts if something feels off. The right cricket helmet should feel like a natural extension of your protective gear, providing confidence and security without constant adjustment or distraction.
Step 4: Adjust Padding and Straps as Needed
Customizing your cricket helmet’s padding and straps transforms a standard-sized helmet into your personal protective gear. Proper adjustment is the difference between a good helmet and a great one, ensuring both safety and comfort during intense cricket matches.
Start by examining the internal padding. Most cricket helmets come with removable and adjustable padding that allows for fine-tuning the fit. These foam or gel inserts help create a snug, uniform contact between your head and the helmet’s interior. Carefully position these padding elements to eliminate any noticeable gaps or pressure points, focusing on creating a consistent cushioning layer around your entire head.
According to research from Loughborough University, precise helmet fit is crucial in preventing potential head injuries. The chin strap represents a critical adjustment point. When adjusting, ensure it sits comfortably against your chin, allowing you to speak and breathe naturally while preventing the helmet from shifting during sudden movements.
The ideal chin strap tension allows you to open your mouth comfortably but remains secure enough to keep the helmet stable during aggressive batting or fielding scenarios. Most modern cricket helmets feature adjustable buckles or sliding mechanisms that enable precise strap customization. Experiment with different tension levels, checking that the helmet remains firmly in place when you shake your head or perform quick directional changes.
Pay special attention to side and rear padding. These areas are crucial for maintaining stability and preventing rotational movement during impact. Gently press the padding around these regions, ensuring they conform closely to your head’s natural shape without creating uncomfortable pressure points.
Verify your padding and strap adjustments through these critical checks:
- Helmet remains stable during head movements
- No significant pressure or pinching sensations
- Chin strap allows comfortable mouth movement
- Padding provides uniform contact around the head
- No visible gaps between helmet interior and head
Remember that padding can compress over time, so periodically reassess your helmet’s fit. Some players find it helpful to wear their typical inner cap or skull cap during the adjustment process to simulate actual playing conditions. This ensures the helmet performs consistently with your regular cricket gear.
Take your time with this step. Rushing through padding and strap adjustments can compromise your helmet’s protective capabilities. A well-adjusted helmet feels like a natural extension of your cricket equipment, providing confidence and security without constant readjustment.
Step 5: Perform a Safety Check Before Use
A final comprehensive safety check transforms your carefully selected cricket helmet from a mere piece of equipment into a reliable protective shield. This critical step bridges the gap between fitting and actual game-ready protection, ensuring your helmet meets the highest safety standards before you step onto the cricket pitch.
Begin by thoroughly examining the helmet’s exterior for any signs of structural compromise. Look closely for hairline cracks, deep scratches, or areas of visible wear that might compromise the helmet’s protective integrity. Pay special attention to the shell’s surface, checking for any deformations or unusual irregularities that could indicate previous impact or material weakness.
According to the Centers for Disease Control and Prevention, well-maintained protective gear is fundamental to injury prevention. Inspect the internal padding meticulously, ensuring it remains firmly attached and shows no signs of deterioration. Gently press each padding section, checking for consistent cushioning and noting any areas of compression or uneven wear that might reduce the helmet’s protective capabilities.
The chin strap represents a critical safety component requiring careful examination. Test the buckle mechanism, ensuring it opens and closes smoothly without sticking or showing signs of metal fatigue. Verify that the strap’s elastic properties remain robust, providing consistent tension without stretching out or losing its original elasticity. Run your fingers along the entire length of the strap, feeling for any fraying, loose threads, or potential weak points.
Conduct a practical stability test by performing a series of dynamic movements. Shake your head vigorously, rotate quickly, and perform batting-like motions to confirm the helmet remains secure. The helmet should move in perfect synchronization with your head, without sliding, rotating, or creating any uncomfortable gaps.
Verify your helmet’s safety through these critical inspection points:
- No visible cracks or structural damage on exterior shell
- Internal padding remains firmly attached and uniformly cushioned
- Chin strap operates smoothly with consistent tension
- Helmet maintains stability during sudden head movements
- No signs of material degradation or excessive wear
Check the helmet’s certification label, confirming it meets current safety standards. Most modern cricket helmets feature clear markings indicating compliance with international safety regulations. If the label appears worn or illegible, contact the manufacturer for verification.
Remember that a safety check is not a one-time event. Regularly inspect your helmet before each cricket season, and replace it immediately if you notice any compromising damage. Your helmet is your primary defense against potential head injuries, making this final safety assessment an investment in your long-term health and cricket performance.
Upgrade Your Helmet Fit for Real Protection and Comfort
Have you ever measured your head for a cricket helmet only to feel uncertain about the right size or worried the helmet won’t truly protect you when it matters? This article highlighted the struggle to get an accurate fit, the need for reliable size charts, and the real risk of discomfort or unsafe gear affecting your performance. At CricketKingdom.co.uk, we turn these concerns into confidence by making professional guidance and top-quality helmets easy to find with features like free shipping on large orders, expert advice, and reviews from real players.
Ready to make sure your helmet fits perfectly and protects you every time you step onto the field? Explore our full selection of cricket helmets and gear where you can compare sizes, check real customer feedback, and take advantage of exclusive benefits like secure payment options and free extras for top-tier purchases. Do not risk your safety or comfort – act now at CricketKingdom.co.uk and find cricket equipment that matches your measurements and your game.
Frequently Asked Questions
How do I measure my head circumference for a cricket helmet?
To measure your head circumference, use a flexible measuring tape or a piece of string wrapped around your head about one inch above your eyebrows. Ensure it passes around the fullest part of your head for the most accurate measurement. Record this in both centimeters and inches for reference.
What should I do if my head measurement falls between sizes?
If your head measurement is between two sizes, it is generally recommended to choose the larger size for better comfort and safety. A larger helmet can often be adjusted using padding.
What key factors should I consider when trying on a cricket helmet?
When trying on a cricket helmet, ensure that the chin strap is securely fastened, the helmet remains stable during head movements, and there are no significant pressure points or gaps. It should feel snug but comfortable without obstructing your vision.
How often should I perform a safety check on my helmet?
You should perform a safety check on your cricket helmet before each season, ensuring it remains free from cracks, wear, and that the internal padding and chin strap are still effective. If you notice any damage, consider replacing the helmet immediately.
Article generated by BabyLoveGrowth