Cricket Bat Maintenance Guide: Keep Your Bat Match-Ready
Over 90 percent of professional cricketers believe regular bat maintenance extends the lifespan and power of their gear. Whether you play every weekend or just enjoy the occasional match, caring for your cricket bat helps you avoid cracks, boosts performance, and saves money in the long run. Mastering a few simple steps makes all the difference for those unforgettable drives and match-winning boundaries.
Quick Summary
| Key Point | Explanation |
|---|---|
| 1. Prepare your bat carefully | Inspect and gently knock in your bat using a mallet or old ball for six hours to enhance performance and durability. |
| 2. Clean the bat thoroughly | Use a soft cloth to remove dust and debris, especially from the face and edges, without introducing moisture to protect the wood. |
| 3. Apply linseed oil effectively | Use two thin coats of raw linseed oil to nourish and protect the bat, allowing 24 hours for each coat to absorb completely. |
| 4. Knock in and practice properly | Dedicate 4-5 hours to evenly knock in the bat and follow with short practice sessions to adapt it to gameplay conditions. |
| 5. Regularly inspect and test performance | Check for cracks and responsiveness after each use to catch issues early, ensuring your bat remains in peak condition. |
Table of Contents
- Step 1: Prepare Your Cricket Bat For Maintenance
- Step 2: Clean The Bat Surface Thoroughly
- Step 3: Oil And Condition The Willow Effectively
- Step 4: Knock In And Protect The Bat Properly
- Step 5: Inspect And Test Bat Performance
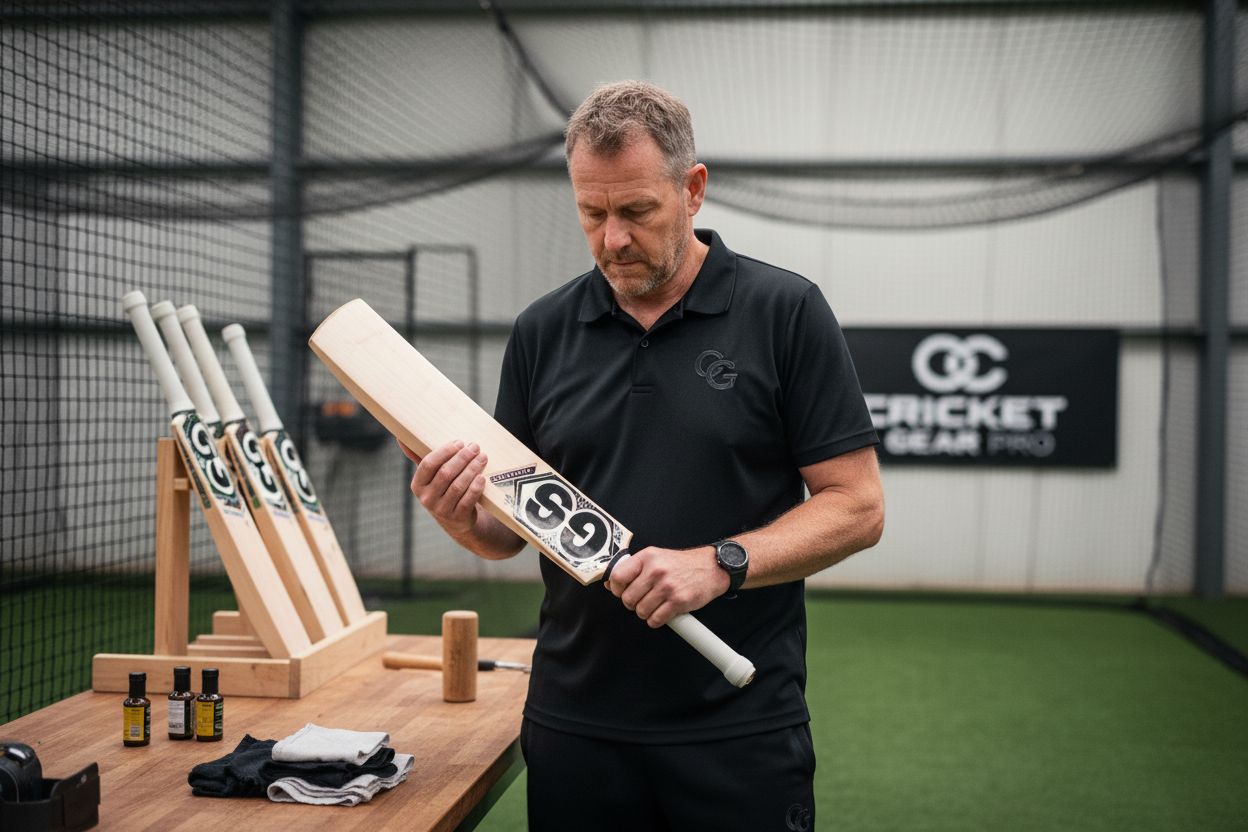
Step 1: Prepare Your Cricket Bat for Maintenance
Preparing your cricket bat for maintenance is about giving your willow weapon the royal treatment it deserves. This initial preparation sets the stage for a bat that will deliver powerful shots and last through multiple seasons.
Before diving into maintenance, gather your essential tools. You will need a specialized cricket bat mallet or an old cricket ball, some linseed oil, a clean soft cloth, and about 30 minutes of focused attention. According to research from BBC Cricket Bats, cricket bats made of natural willow require dedicated knocking in to enhance their durability and performance.
Start by examining your bat carefully. Look for any existing cracks, splinters, or unusual wear patterns. Run your hand gently along the bat’s surface to feel its current condition. Your goal is to understand what specific maintenance steps your bat might need.
The critical first stage involves gentle compression of the bat’s wood fibers. This process requires a minimum of six hours of careful striking using a bat mallet or an old cricket ball. Strike the bat systematically across its surface area applying consistent but moderate pressure. Do not whack the bat hard instead focus on gentle yet firm strikes that gradually compress the wood.
Pro Tip: Always strike the bat at a slight angle rather than directly perpendicular to avoid creating unnecessary stress points on the wood.
As you work through the knocking in process, rotate the bat regularly to ensure even compression. Think of this like kneading bread dough you want uniform texture and strength throughout. This methodical approach prepares your bat to withstand the intense impacts of actual gameplay.
Once you complete the initial knocking in stage your bat will feel slightly different. The wood will seem more compact and resilient. This transformation signals you are ready to move toward the next maintenance steps of oiling and conditioning your cricket bat.
Ready to transform your cricket bat into a match ready powerhouse? Let’s continue to the next maintenance phase.
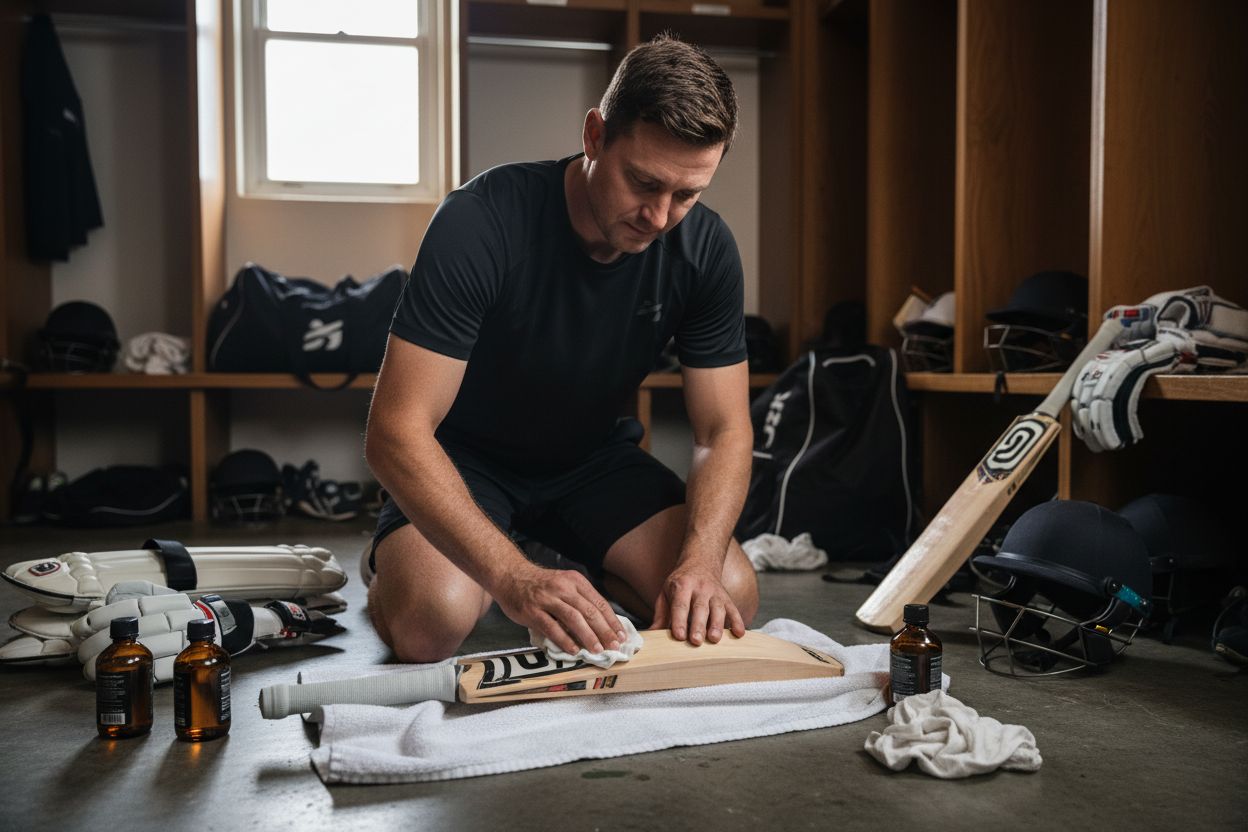
Step 2: Clean the Bat Surface Thoroughly
Keeping your cricket bat clean is more than just a cosmetic exercise it is a critical step in maintaining your bat’s performance and longevity. A clean bat not only looks professional but also helps you spot potential issues before they become serious problems.
According to insights from The Times Sports, proper cleaning involves a gentle yet systematic approach. Start by grabbing a soft cloth ideally one that is slightly soft and clean. You want something that can pick up dust and light debris without scratching your bat’s delicate willow surface.
Begin at the bat’s face the area that makes direct contact with the ball. Wipe carefully in a single direction using light pressure. Imagine you are smoothing out a delicate fabric rather than scrubbing a tough stain. Move systematically across the entire face ensuring you capture any accumulated dirt or chalk residue.
Next focus on the edges and handle. These areas often collect sweat dirt and grime from your hands and playing environment. Use your soft cloth to gently wipe these surfaces making sure not to apply excessive moisture. The key is to remove surface dirt without introducing water that could potentially damage the wood.
Pro Tip: Always use a dry or slightly damp cloth never soak the bat or use wet cleaning methods that could compromise the wood’s structural integrity.
After cleaning allow your bat to air dry completely. Do not store it immediately or apply any treatments while the surface is still damp. Patience here prevents potential moisture damage that could weaken the bat’s wood fibers.
Remember cleaning is not just about appearance it is about preserving your bat’s performance. A well maintained surface helps maintain the bat’s responsiveness and can extend its overall lifespan.
![]()
With your bat now clean and ready we are set to move on to the next critical maintenance step. Your cricket bat is slowly transforming from a simple piece of equipment to a finely tuned performance tool.
Here’s a summary of essential cricket bat maintenance steps:
| Step | Main Action | Key Tools/Materials | Time Needed |
|---|---|---|---|
| Prepare Bat | Inspect, knock in | Mallet Old cricket ball |
6+ hours (knocking) |
| Clean Surface | Wipe face & edges | Soft cloth | 5-10 minutes |
| Oil & Condition | Apply linseed oil | Linseed oil Soft cloth |
24+ hours (drying) |
| Knock In & Protect | Compress fibers, net practice | Mallet Old ball |
2-5 hours |
| Inspect/Test | Check for cracks, responsiveness | Good lighting Hands |
5 minutes |
Step 3: Oil and Condition the Willow Effectively
Oiling your cricket bat is like giving it a nutritious meal that keeps its willow fibers strong and resilient. This crucial maintenance step protects your bat from cracking drying out and ensures it remains performance ready for every match.
According to research from Ciel Sports, new cricket bats require 2 to 3 thin coats of raw linseed oil during the initial knocking in period. As recommended by Vallow Sports, your approach should be strategic and precise.
Start by selecting a high quality raw linseed oil specifically designed for cricket bats. Pour a small amount onto a clean soft cloth. You want just enough oil to create a light sheen not a heavy saturated coating. Begin applying the oil on the bat’s face moving in smooth even strokes from the center towards the edges.
Focus on covering the face edges and toe of the bat thoroughly. These are the areas that experience the most stress during gameplay. Be extremely careful to avoid the handle and any stickers which can be damaged by oil. Your goal is a thin uniform layer that will penetrate and protect the wood without adding unnecessary weight.
Pro Tip: Less is more when it comes to oiling. Two thin coats are typically sufficient prevent over oiling which can compromise your bat’s performance.
After applying the first coat lay your bat horizontally in a cool dry place. Allow approximately 24 hours for the oil to completely absorb into the wood. This waiting period is crucial as it allows the linseed oil to penetrate deeply and nourish the willow fibers.
Once the first coat has dried completely apply a second thin layer following the same methodical approach. In dry climates experts recommend re oiling your bat every few months to maintain its moisture and prevent cracking.
With each careful application your bat becomes more resilient.
 You are not just maintaining equipment you are preserving a precision instrument that will serve you through countless matches and memorable moments on the cricket field.
Ready to take your bat maintenance to the next level? Let us explore how to protect and store your newly conditioned cricket companion.
Step 4: Knock In and Protect the Bat Properly
Knocking in your cricket bat is a critical ritual that transforms a raw piece of willow into a match ready weapon. This process prepares your bat to withstand the intense impacts of gameplay while reducing the likelihood of premature cracking.
According to Cricket World Australia, adult bats require 4 to 5 hours of dedicated knocking in while junior bats need around 2 to 3 hours. BBC Cricket Bats recommends a multi stage approach that gradually conditions your bat for optimal performance.
Begin with your specialized bat mallet or an old cricket ball. Start gently striking the bat’s face focusing on creating even compression across the surface. Your goal is not to hammer the bat but to gradually compress its wood fibers. Move systematically covering the entire playing surface while carefully avoiding the splice area which is more delicate and prone to damage.
Apply moderate pressure with each strike ensuring you are not creating sharp impacts that could cause micro fractures. Think of this process like breaking in a new pair of leather shoes you want to soften and prepare the material without causing unnecessary stress.
Pro Tip: Always strike at a slight angle rather than perpendicular to prevent creating unintended stress points on the bat’s surface.
After completing the initial mallet work move to short catching practice in nets. This helps further condition the bat by introducing realistic playing conditions. Gradually progress to more extended net sessions using an old ball. This step helps your bat adapt to actual gameplay scenarios while continuing to compress and strengthen its wood fibers.
Remember the knocking in process is not just about physical preparation it is about developing a relationship with your cricket bat. Each carefully applied strike is an investment in your equipment’s future performance.
With your bat now properly conditioned we are ready to explore the final stages of bat maintenance that will keep your willow companion in peak condition. Discover more about cricket gear maintenance in our comprehensive guide.
Step 5: Inspect and Test Bat Performance
Inspecting your cricket bat is like performing a health checkup on your most trusted playing companion. Regular performance checks can mean the difference between a bat that performs brilliantly and one that fails you during a critical match moment.
According to Cricket Kingdom’s Care Checklist, thorough inspections require good lighting and a meticulous eye. Start by examining the bat under bright natural light. Focus on key stress areas like the edges face spine and the critical handle connection point.
Run your fingers gently across the bat’s surface feeling for any subtle changes. Look for tiny hairline cracks or unexpected softness that might indicate internal wood damage. Pay special attention to the edges where most impact occurs. Discoloration or unusual texture changes can signal potential structural weakness.
Cricket World Australia recommends post session inspections to catch minor damages early. After each practice or match take a few moments to conduct a quick but comprehensive assessment of your bat’s condition.
Pro Tip: Small surface cracks might seem insignificant but can rapidly develop into major structural issues if left unaddressed.
Test your bat’s responsiveness by gently tapping different areas and listening to the sound. A healthy bat will produce a consistent solid sound. Uneven or dull sounds could indicate internal fiber breakdown or potential structural compromise.
Seasonally perform more extensive maintenance like re oiling and checking grip condition. Think of this as a full service for your cricket bat ensuring it remains in peak performance condition.
Explore advanced cricket bat performance technologies to understand how modern equipment can help you track and improve your batting performance.
With these inspection techniques you are not just maintaining equipment you are preserving a precision instrument that represents your cricket journey.
Ready to Take Your Bat Maintenance Beyond Basics?
You have learned the secrets of keeping your cricket bat match-ready. But maintaining your bat is just the start. Many players struggle with the right gear or high-quality oils and mallets to truly protect their investment. If you want your willow to stay powerful and resilient, it is time to upgrade both your equipment and the care you give it. At CricketKingdom.co.uk, we understand the frustration of cracks, dry spots, and bats that do not last a full season. That is why we offer not just bats but all the professional-grade accessories, and even free bat oiling and knocking services with premium purchases.

Make sure your next match is your best yet. Discover the wide range of reliable cricket gear and bat care products that serious players trust. Explore exclusive offers, see what other cricketers are saying in our customer reviews, and experience unbeatable support. Do not let bat maintenance be your weak point.
VIDEO:video_content] Visit [CricketKingdom.co.uk now to keep your equipment performing at its highest level, season after season.
Frequently Asked Questions
How do I prepare my cricket bat for maintenance?
To prepare your cricket bat for maintenance, begin by inspecting it for cracks or unusual wear patterns. Dedicate at least six hours to gently knock in the bat using a mallet or an old cricket ball to compress the wood fibers evenly.
What is the best way to clean my cricket bat’s surface?
Clean your cricket bat’s surface by using a soft, dry cloth to wipe down the face, edges, and handle. Focus on using light pressure and avoid soaking the bat to protect its wood integrity.
How often should I oil my cricket bat, and what is the process?
Oil your cricket bat every few months, applying two thin coats of raw linseed oil during the initial maintenance period. Use a clean cloth to apply the oil in smooth strokes from the center of the face toward the edges, allowing 24 hours for each coat to dry completely.
What steps should I follow for knocking in my cricket bat?
Knocking in your cricket bat involves striking the bat’s face gently for 4 to 5 hours with a specialized mallet, ensuring even compression. After the initial knocking, practice with a soft ball to adapt the bat to gameplay conditions.
How can I inspect my cricket bat for damage?
Inspect your cricket bat by examining it under good lighting for hairline cracks or soft areas, especially around the edges and handle. Run your fingers over its surface to feel for any changes, and test its responsiveness by tapping different areas to listen for consistent sound quality.
What maintenance steps should I take seasonally for my cricket bat?
Seasonally, conduct a thorough inspection to check for cracks, re-oil the bat if necessary, and ensure the grip is in good condition. Performing these checks every few months can significantly extend your bat’s performance and lifespan.
Recommended
- Ultimate Guide to Choosing the Right Cricket Bat | the Cricket Kingdom
- 9 Essential Items for Your Cricket Equipment Checklist – The Cricket Kingdom
- How to Choose Cricket Bat: A Step-by-Step Guide for Players – The Cricket Kingdom
- Essential Cricket Equipment in the UK: Must-Have Gear for Every Cricketer – The Cricket Kingdom