How to Knock In a Cricket Bat for Optimal Performance
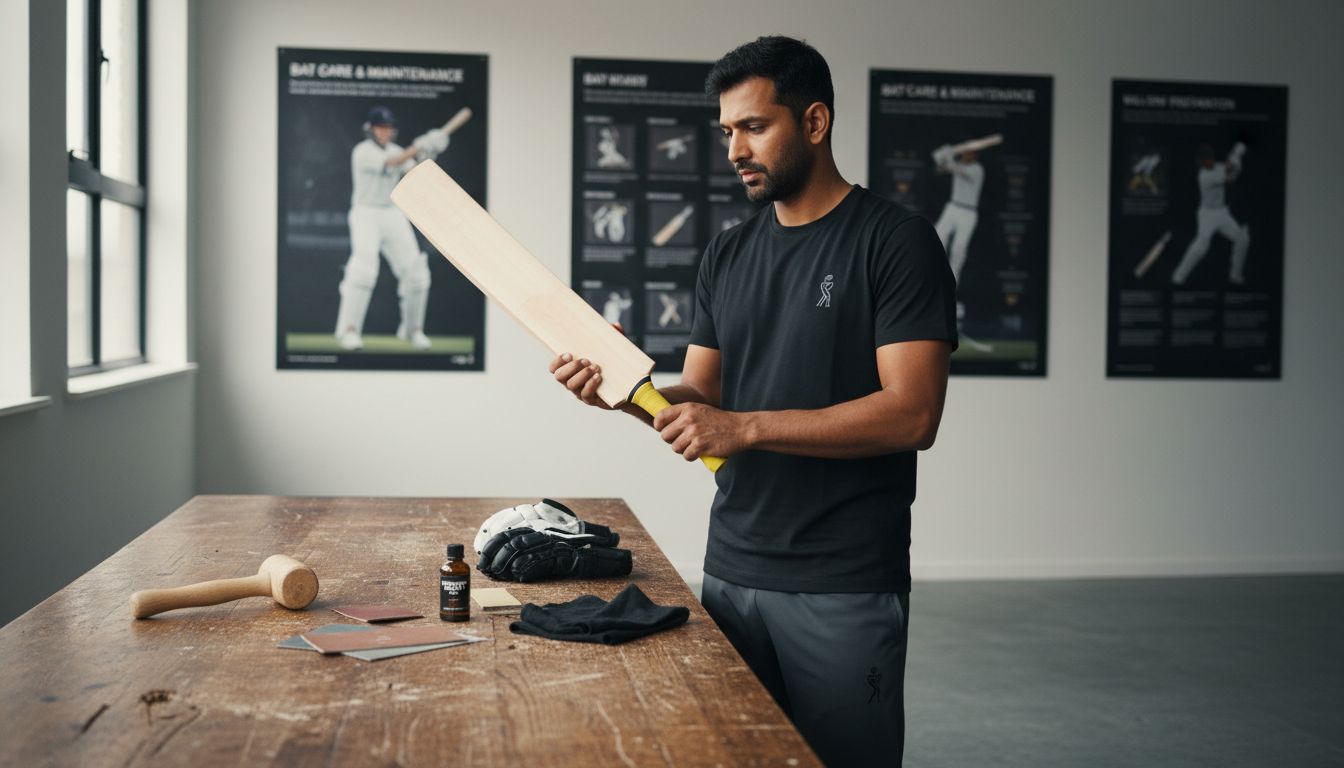
Every american cricket player knows the excitement of getting a new bat, but the right preparation can be the difference between a quick crack and seasons of solid play. Properly knocking in a cricket bat protects its surface, lowers the risk of cracks, and boosts overall performance. Over 80 percent of bat damages happen in the first months without correct conditioning. This step-by-step guide helps you gather the key tools and techniques so your bat feels ready for every challenge on the field.
Table of Contents
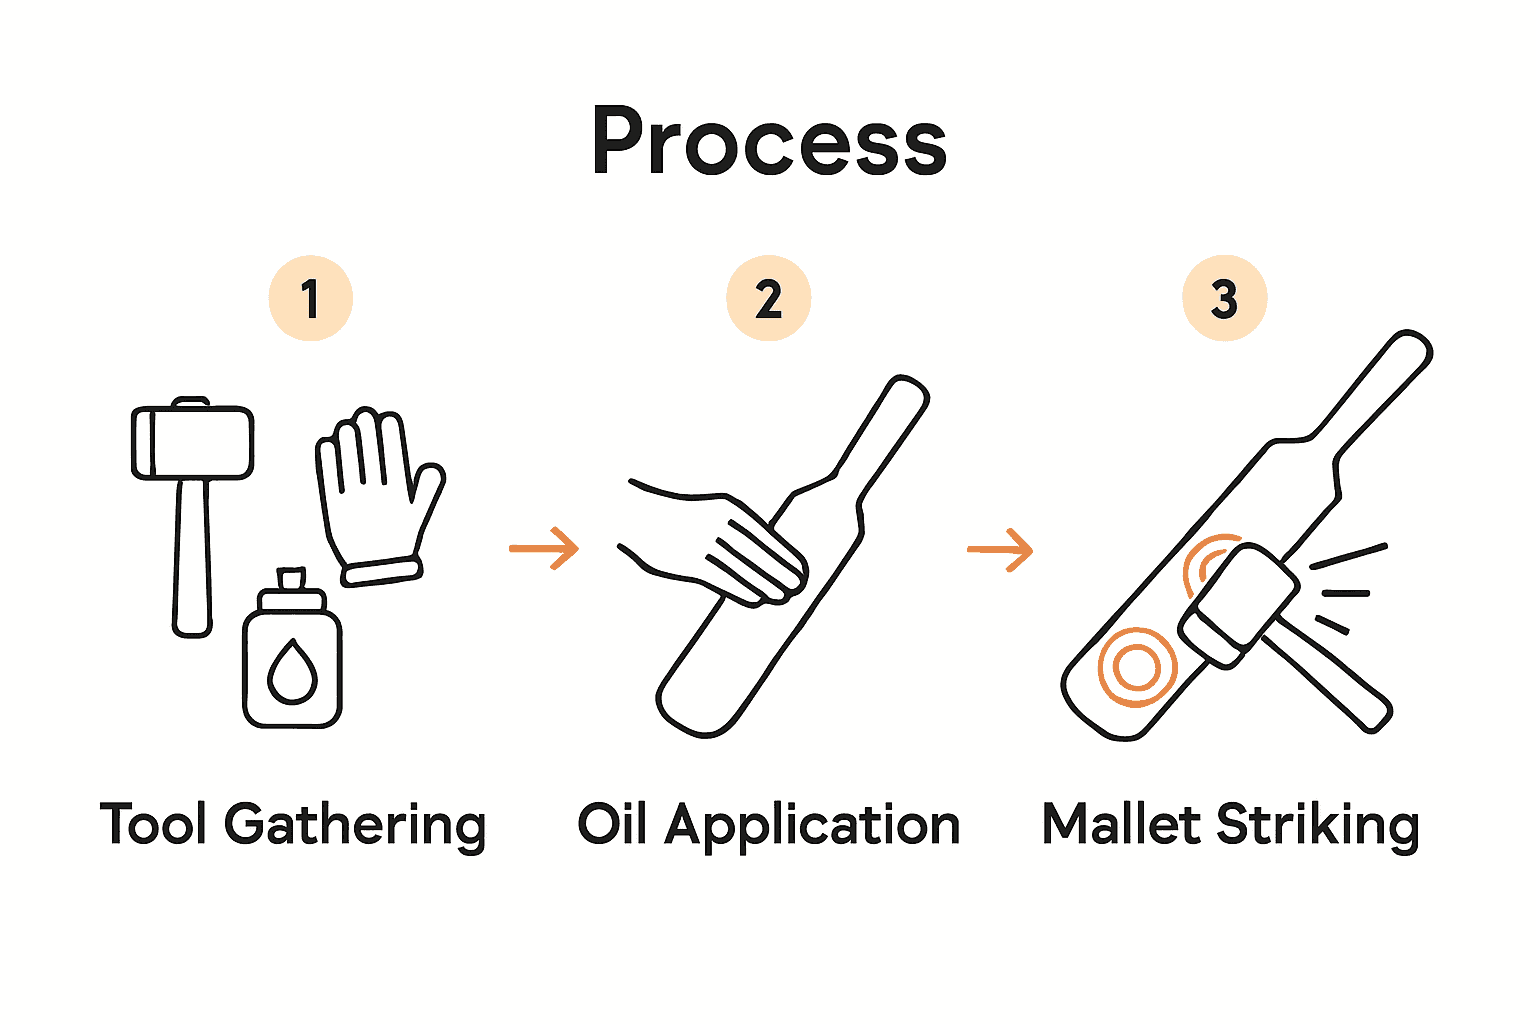
- Step 1: Gather Essential Knocking-In Tools And Materials
- Step 2: Apply Protective Bat Oil For Initial Conditioning
- Step 3: Use A Mallet To Carefully Strike The Bat Surface
- Step 4: Test Bat Readiness And Complete The Final Finishing
Quick Summary
| Important Insight | Explanation |
|---|---|
| 1. Gather essential tools first | Use a soft wooden mallet, bat oil, and sandpaper to prepare your bat effectively. Organizing tools simplifies the knocking-in process. |
| 2. Apply bat oil carefully | Use a lint-free cloth to spread a thin layer of oil on the bat. This protects the wood and enhances longevity without over-saturating. |
| 3. Strike with gentle precision | Use controlled mallet strikes focused on edges and face, rotating the bat to ensure even conditioning and avoid damage. |
| 4. Conduct a tap test | Lightly tap the bat to listen for a consistent sound. This helps identify areas needing more conditioning before use. |
| 5. Finalize with additional oil | After verifying balance, apply another thin layer of oil to ensure protection and prepare the bat for play. |
Step 1: Gather Essential Knocking-In Tools and Materials
Knocking in a cricket bat requires precision and the right equipment. You will need to collect several key tools and materials that will help you properly prepare your bat for optimal performance on the cricket field.
Your essential toolkit should include a specialized cricket bat mallet (preferably made of soft wood like willow), a clean lint-free cloth, cricket bat oil or conditioning oil, protective gloves, and sandpaper with a medium-fine grit. A sturdy workbench or flat surface will provide the ideal workspace for this delicate process. Pro tip: Avoid using metal hammers or overly hard mallets that could damage the bat’s delicate wood fiber structure.
Before beginning, inspect your bat carefully and ensure you have a clean, well-ventilated area where you can work without interruptions. Having all your materials organized and within reach will make the knocking-in process smoother and more efficient.
 This preparation sets the foundation for protecting your bat’s integrity and enhancing its long-term performance on the cricket pitch.
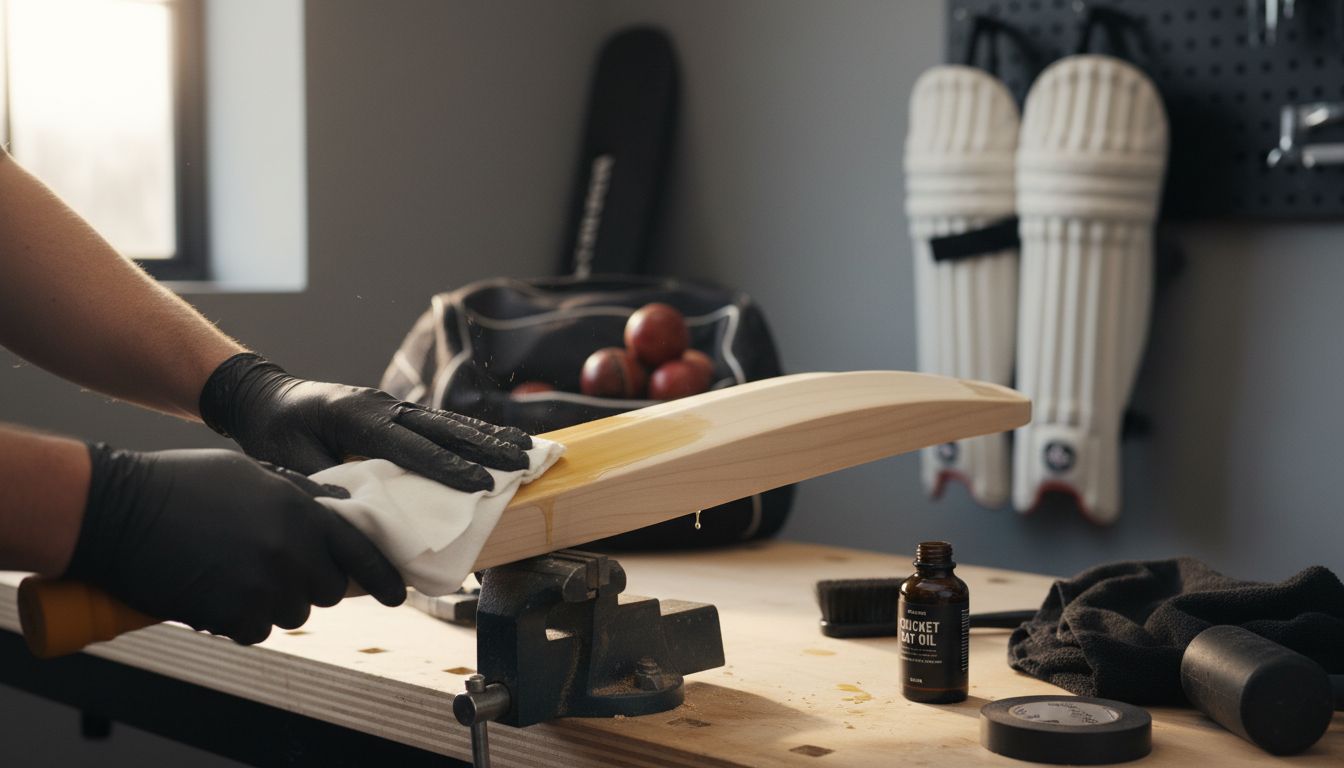
Step 2: Apply Protective Bat Oil for Initial Conditioning
Now that you have gathered your tools, the critical process of applying protective oil to your cricket bat begins. This step is essential for conditioning the wood and preparing it for the rigorous knocking in process that will follow.
Start by using a clean lint-free cloth to apply a thin, even layer of specialized cricket bat oil across the entire surface of the bat. Focus carefully on the bat’s face and edges, ensuring complete but not excessive coverage. Work methodically from the handle toward the toe of the bat, using gentle circular motions that help the oil penetrate the wood fibers. Pro tip: Less is more when it comes to bat oil. Apply sparingly and avoid saturating the wood, which could potentially weaken its structural integrity.
Allow the oil to absorb completely for approximately 24 hours in a cool, dry environment. This initial conditioning will help protect the bat against moisture, reduce potential cracking, and create a more resilient surface for the subsequent knocking in stages.
 Learn more in our comprehensive guide on Cricket Bat Maintenance to ensure your bat receives the best possible care throughout its lifecycle.
Step 3: Use a Mallet to Carefully Strike the Bat Surface
With your bat oiled and prepared, you are now ready to begin the critical process of knocking in. This technique involves systematically striking the bat’s surface with a soft wooden mallet to compress and strengthen the wood fibers, ensuring your bat can withstand the impact of cricket balls.
Begin by holding the mallet at a 45 degree angle and applying gentle, consistent strikes across the bat’s face. Start near the edges and work your way toward the center, using light to moderate force. Focus on creating an even distribution of impacts, rotating the bat periodically to ensure uniform conditioning. Avoid striking too hard, as excessive force can cause splintering or damage to the wood grain. Pro tip: Think of this process like breaking in a new baseball glove. You want to create controlled compression without overwhelming the material.
Pay special attention to the bat’s edges and toe, which are most vulnerable to potential cracking. Use slightly softer strikes in these areas, gradually building up the wood’s resilience. Explore our comprehensive cricket bat care checklist to ensure you are following best practices throughout this delicate conditioning process. After approximately 30 minutes of careful striking, your bat will begin to develop the necessary strength and responsiveness for optimal performance.
Step 4: Test Bat Readiness and Complete the Final Finishing
As you approach the final stage of bat preparation, it is crucial to carefully assess whether your cricket bat has been properly conditioned and is ready for match play. This final testing phase will help you determine if the knocking in process has been successful and if the bat has achieved the desired level of resilience and performance.
Begin by conducting a gentle tap test across the bat’s surface. Using your mallet, lightly strike different areas of the bat and listen for a consistent, solid sound. The bat should produce a uniform tone without any hollow or weak spots. Next, visually inspect the bat for any signs of uneven compression or potential structural issues. Pay close attention to the edges and toe of the bat, ensuring they have been evenly conditioned and show no signs of splintering or excessive wear. Pro tip: If you notice any areas that sound significantly different or look compressed unevenly, you may need to continue the knocking in process with additional careful strikes.
Finalize your bat preparation by applying a final thin layer of protective oil and allowing it to absorb completely. Consult our essential cricket bat care tips to ensure you are following the most up to date maintenance practices. Your bat is now ready for its first practice session or match, having undergone a comprehensive conditioning process that will help maximize its performance and longevity on the cricket field.
Prepare Your Cricket Bat Like a Pro with CricketKingdom.co.uk
Knocking in your cricket bat correctly is crucial to maximize performance and extend its lifespan. The article highlights the challenges of protecting your bat from cracking and ensuring the wood fibers are properly compressed through precise oiling and mallet striking. If you want to save time and guarantee expert-level preparation, consider leveraging the professional services and quality products offered at CricketKingdom.co.uk. From specialized cricket bat oils to custom knocking-in services for high-value bats, we provide everything you need to confidently get your bat match-ready.

Don’t risk damaging your valuable bat by attempting knocking in without the right tools and knowledge. Take the next step now by browsing our selection of cricket bats and expert care accessories. Plus, enjoy benefits like free shipping on orders over £100 and flexible payments with Klarna. Visit CricketKingdom.co.uk and discover how you can protect and enhance your bat’s performance with proven products and professional support.
Frequently Asked Questions
What tools do I need to knock in a cricket bat?
You will need a cricket bat mallet, a clean lint-free cloth, cricket bat oil, protective gloves, and medium-fine grit sandpaper. Gather these items to ensure you can prepare your bat effectively for optimal performance.
How do I apply oil to my cricket bat?
Use a clean lint-free cloth to apply a thin, even layer of cricket bat oil, focusing on the bat’s face and edges. Allow the oil to absorb completely for about 24 hours in a cool, dry area to condition the wood properly before knocking in.
What is the knocking in process for a cricket bat?
Knocking in involves carefully striking the bat’s surface with a mallet to compress the wood fibers. Start with light strikes at a 45-degree angle near the edges, gradually working toward the center for about 30 minutes to build resilience without damaging the bat.
How can I test if my cricket bat is ready for match play?
Perform a gentle tap test by striking different areas of the bat with the mallet to listen for a consistent sound. Ensure it produces a solid tone without any hollow areas, indicating that the knocking in process has been successful.
How often should I apply oil to my cricket bat?
It’s recommended to apply a thin layer of protective oil at least once every few months or before the start of the season, depending on usage. Regular oiling will help maintain the bat’s moisture resistance and prevent cracking over time.
Can I use any mallet for knocking in my cricket bat?
No, it’s best to use a soft wooden mallet made specifically for cricket bats, ideally willow. Avoid metal hammers or hard mallets that can damage the bat’s wood fibers during the knocking in process.
Recommended
- Cricket Bat Maintenance Guide: Keep Your Bat Match-Ready – The Cricket Kingdom
- Why Custom Cricket Bats Matter: Understanding Their Impact – The Cricket Kingdom
- What is a Cricket Bat? Understanding Its Importance and Design – The Cricket Kingdom
- Essential Cricket Bat Care Tips for Peak Performance – The Cricket Kingdom